WordPress 是一种内容管理系统 (CMS),广泛用于创建博客、网站、电子商务门户等。 它是用 PHP 语言编写的,使用 MariaDB 或 MySQL 作为数据库。
WordPress 为超过 6000 万个网站提供支持,其中包括前 1000 万个网站中的 33%。
这是有关如何在 CentOS 8 / RHEL 8 上使用 Nginx 安装 WordPress 的教程。
本文档也适用于 CentOS 7 Ubuntu 18.04 Ubuntu 16.04
安装 LEMP 堆栈
在继续之前,请使用以下链接设置 LEMP 堆栈。
在 CentOS 8 / RHEL 8 上安装 LEMP Stack(Nginx、MariaDB 和 PHP)
安装 PHP 扩展
在 CentOS 8 / RHEL 8 上安装 WordPress 需要以下扩展。
yum install -y php-mysqlnd php-dom php-simplexml php-xml php-xmlreader php-curl php-exif php-ftp php-gd php-iconv php-json php-mbstring php-posix php-sockets php-tokenizer
为 WordPress 配置 Nginx 服务器块
让我们为 WordPress 安装创建一个服务器块。 虚拟主机配置文件可以在下面找到 /etc/nginx/conf.d 目录。
我正在为以下内容创建服务器块,
域名: www.itzgeek.net
端口号: 80
文件根: /sites/www.itzgeek.net/public_html
日志: /sites/www.itzgeek.net/logs
首先,创建一个虚拟主机文件。
vi /etc/nginx/conf.d/www.itzgeek.net.conf
放置以下内容。
server { listen 80; server_name www.itzgeek.net; root /sites/www.itzgeek.net/public_html/; index index.html index.php; access_log /sites/www.itzgeek.net/logs/access.log; error_log /sites/www.itzgeek.net/logs/error.log; # Don't allow pages to be rendered in an iframe on external domains. add_header X-Frame-Options "SAMEORIGIN"; # MIME sniffing prevention add_header X-Content-Type-Options "nosniff"; # Enable cross-site scripting filter in supported browsers. add_header X-Xss-Protection "1; mode=block"; # Prevent access to hidden files location ~* /.(?!well-known/) { deny all; } # Prevent access to certain file extensions location ~.(ini|log|conf)$ { deny all; } # Enable WordPress Permananent Links location / { try_files $uri $uri/ /index.php?$args; } location ~ .php$ { include /etc/nginx/fastcgi_params; fastcgi_pass 127.0.0.1:9000; fastcgi_index index.php; fastcgi_param SCRIPT_FILENAME $document_root$fastcgi_script_name; } }
创建文档根目录和日志目录。
sudo mkdir -p /sites/www.itzgeek.net/public_html/ sudo mkdir -p /sites/www.itzgeek.net/logs/
验证配置文件。
nginx -t
以下输出确认服务器块中没有语法错误。
nginx: the configuration file /etc/nginx/nginx.conf syntax is ok nginx: configuration file /etc/nginx/nginx.conf test is successful
重新启动服务。
systemctl restart nginx systemctl restart php-fpm
如果您在重新启动 Nginx 服务时遇到任何错误,请在您的机器上禁用 SELinux。
setenforce 0
为 WordPress 安装 Let’s Encrypt SSL(可选)
如今,几乎所有网站都使用 HTTPS(SSL 证书)来确保真实性、安全性并保护用户通信的私密性。 谷歌去年要求所有者 切换到 HTTPS 为了安全和提高排名。
安装证书机器人
你需要安装 Certbot ACME 客户端 在您的系统上进行证书颁发和证书安装,无需停机。
Certbot 客户端在 Red Hat 存储库中不可用。 因此,我们需要从其官方站点下载 Certbot 客户端。
curl -O https://dl.eff.org/certbot-auto mv certbot-auto /usr/local/bin/certbot-auto chmod 0755 /usr/local/bin/certbot-auto
更新/更改 DNS 记录
转到您的域注册商并为您的域创建/更新 A/CNAME 记录。
等待一段时间让 DNS 记录传播,然后继续安装 Let’s Encrypt SSL。
安装 Let’s Encrypt SSL 证书
使用 certbot 命令创建并安装 Let’s Encrypt 证书。
/usr/local/bin/certbot-auto --nginx
在第一次运行时,certbot 客户端将安装所需的 rpm 包,用于设置 Python 虚拟环境以生成证书。
输出:
Saving debug log to /var/log/letsencrypt/letsencrypt.log Plugins selected: Authenticator nginx, Installer nginx Enter email address (used for urgent renewal and security notices) (Enter 'c' to cancel): [email protected] << Enter email id to receive notification - - - - - - - - - - - - - - - - - - - - - - - - - - - - - - - - - - - - - - - - Please read the Terms of Service at https://letsencrypt.org/documents/LE-SA-v1.2-November-15-2017.pdf. You must agree in order to register with the ACME server at https://acme-v02.api.letsencrypt.org/directory - - - - - - - - - - - - - - - - - - - - - - - - - - - - - - - - - - - - - - - - (A)gree/(C)ancel: A << Accept Terms of Service - - - - - - - - - - - - - - - - - - - - - - - - - - - - - - - - - - - - - - - - Would you be willing to share your email address with the Electronic Frontier Foundation, a founding partner of the Let's Encrypt project and the non-profit organization that develops Certbot? We'd like to send you email about our work encrypting the web, EFF news, campaigns, and ways to support digital freedom. - - - - - - - - - - - - - - - - - - - - - - - - - - - - - - - - - - - - - - - - (Y)es/(N)o: Y << Subscribe to newsletter Which names would you like to activate HTTPS for? - - - - - - - - - - - - - - - - - - - - - - - - - - - - - - - - - - - - - - - - 1: www.itzgeek.net - - - - - - - - - - - - - - - - - - - - - - - - - - - - - - - - - - - - - - - - Select the appropriate numbers separated by commas and/or spaces, or leave input blank to select all options shown (Enter 'c' to cancel): 1 << Install SSL certificate for www.itzgeek.net Obtaining a new certificate Performing the following challenges: http-01 challenge for www.itzgeek.net Waiting for verification... Cleaning up challenges Deploying Certificate to VirtualHost /etc/nginx/conf.d/wordpress.conf Please choose whether or not to redirect HTTP traffic to HTTPS, removing HTTP access. - - - - - - - - - - - - - - - - - - - - - - - - - - - - - - - - - - - - - - - - 1: No redirect - Make no further changes to the webserver configuration. 2: Redirect - Make all requests redirect to secure HTTPS access. Choose this for new sites, or if you're confident your site works on HTTPS. You can undo this change by editing your web server's configuration. - - - - - - - - - - - - - - - - - - - - - - - - - - - - - - - - - - - - - - - - Select the appropriate number [1-2] then [enter] (press 'c' to cancel): 2 << Redirect HTTP traffic to HTTPS site Redirecting all traffic on port 80 to ssl in /etc/nginx/conf.d/wordpress.conf - - - - - - - - - - - - - - - - - - - - - - - - - - - - - - - - - - - - - - - - Congratulations! You have successfully enabled https://www.itzgeek.net You should test your configuration at: https://www.ssllabs.com/ssltest/analyze.html?d=www.itzgeek.net - - - - - - - - - - - - - - - - - - - - - - - - - - - - - - - - - - - - - - - - IMPORTANT NOTES: - Congratulations! Your certificate and chain have been saved at: /etc/letsencrypt/live/www.itzgeek.net/fullchain.pem Your key file has been saved at: /etc/letsencrypt/live/www.itzgeek.net/privkey.pem Your cert will expire on 2019-12-17. To obtain a new or tweaked version of this certificate in the future, simply run certbot-auto again with the "certonly" option. To non-interactively renew *all* of your certificates, run "certbot-auto renew" - Your account credentials have been saved in your Certbot configuration directory at /etc/letsencrypt. You should make a secure backup of this folder now. This configuration directory will also contain certificates and private keys obtained by Certbot so making regular backups of this folder is ideal. - If you like Certbot, please consider supporting our work by: Donating to ISRG / Let's Encrypt: https://letsencrypt.org/donate Donating to EFF: https://eff.org/donate-le
使用 Nginx 将非 www HTTP 请求重定向到 www HTTPS
我们需要将来自非 www HTTP 站点的流量重定向到 www HTTPS 站点。 对于我的网站,它是 https://itzgeek.net >> https://www.itzgeek.net.
vi /etc/nginx/conf.d/www.itzgeek.net.conf
在文件末尾添加块下面的重定向。
# Redirect NON-WWW HTTP to WWW HTTPS server { if ($host = itzgeek.net) { return 301 https://www.itzgeek.net$request_uri; } server_name itzgeek.net; listen 80; return 404; }
重启 Nginx 服务。
systemctl restart nginx
为 WordPress 创建数据库
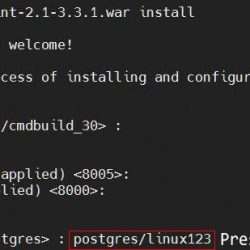
登录到 MariaDB。
mysql -u root -p
为 WordPress 安装创建所需的数据库。
CREATE DATABASE wordpress;
创建用户。
CREATE USER 'wpuser'@'localhost' IDENTIFIED BY 'wppassword';
向创建的用户授予访问新创建的 WordPress 数据库的完全权限。
GRANT ALL PRIVILEGES ON wordpress.* TO 'wpuser'@'localhost';
Exit 来自 MariaDB 外壳。
exit
下载 WordPress
下载最新的 WordPress。
curl -O https://wordpress.org/latest.tar.gz
提取它。
tar -zxvf latest.tar.gz
将其移至我们的文档根目录。
mv wordpress/* /sites/www.itzgeek.net/public_html/
复制 wp-sample-config.php 文件并将其设为 wp-config.php 文件。
cp /sites/www.itzgeek.net/public_html/wp-config-sample.php /sites/www.itzgeek.net/public_html/wp-config.php
编辑配置文件并更新数据库信息。
vi /sites/www.itzgeek.net/public_html/wp-config.php
根据创建的数据库、用户和密码修改条目。
// ** MySQL settings - You can get this info from your web host ** // /** The name of the database for WordPress */ define( 'DB_NAME', 'wordpress' ); /** MySQL database username */ define( 'DB_USER', 'wpuser' ); /** MySQL database password */ define( 'DB_PASSWORD', 'wppassword' ); /** MySQL hostname */ define( 'DB_HOST', 'localhost' );
将 Nginx 用户设为 WordPress 目录的所有者。
chown -R apache:apache /sites/www.itzgeek.net/public_html/
安装 WordPress
打开浏览器并访问
https://your-web-site-url
为您的 WordPress 安装选择一种语言。
Enter 您的站点信息,然后单击安装 WordPress。
您将看到下一页,如下所示。
如果您单击登录,系统会要求您输入密码以访问 WordPress 管理员。
WordPress 管理仪表板:
WordPress 前端:
很少有额外的配置
为 WordPress 配置最大文件大小上传
默认情况下,PHP 不允许上传超过 2MB 的文件。 要允许上传更大的文件,请配置 上传最大文件大小 设置在 配置文件.
vi /etc/php.ini
根据您的要求更改文件上传大小
; Maximum allowed size for uploaded files. ; https://php.net/upload-max-filesize upload_max_filesize = 256M
重新启动 php-fpm 服务。
systemctl restart php-fpm
在 Nginx 上为 WordPress 设置 client_max_body_size
即使您在上一步中更改了最大上传文件大小,您也可能会收到以下错误。
2019/09/18 03:37:17 [error] 11773#11773: *121 client intended to send too large body: 9872781 bytes, client: 49.207.143.143, server: www.itzgeek.net, request: "POST /wp-admin/update.php?action=upload-theme HTTP/1.1", host: "www.itzgeek.net", referrer: "https://www.itzgeek.net/wp-admin/theme-install.php?browse=featured"
添加 client_max_body_size Nginx 配置文件中的核心模块。
vi /etc/nginx/nginx.conf
该指令可以添加到 http 块(对于所有站点)、特定服务器块或位置上下文中。
在这里,我将指令添加到 http 块,该块设置此服务器上运行的所有站点的值。
http { .... client_max_body_size 256M; .... }
此外,我们必须更改的值 post_max_size 在 php.ini 文件中。
vi /etc/php.ini
根据您的要求更改上传大小。
post_max_size = 256M
重新启动服务。
systemctl restart php-fpm systemctl restart nginx
结论
就这样。 我希望您现在能够在 CentOS 8 / RHEL 8 上使用 Nginx 运行您的 WordPress。请在评论部分分享您的反馈。