在本教程中,我们将向您展示如何在 Debian 11 上安装 Icinga 2。对于那些不知道的人,Icinga 2 是一个开源监控解决方案,用于监控各种网络资源的可用性,包括主机指标例如系统正常运行时间、负载、内存、磁盘空间、正在运行的进程、网络等等。 Icinga 2 有一个用户友好的 Web 界面,但它还带有一个命令行界面,可用于通过特定命令监控网络、服务器和服务。
本文假设您至少具备 Linux 的基本知识,知道如何使用 shell,最重要的是,您将网站托管在自己的 VPS 上。 安装非常简单,假设您在 root 帐户下运行,如果不是,您可能需要添加 ‘sudo‘ 到命令以获取 root 权限。 我将向您展示在 Debian 11 (Bullseye) 上逐步安装 Icinga 开源网络监控。
在 Debian 11 Bullseye 上安装 Icinga 2
第 1 步。在我们安装任何软件之前,重要的是通过运行以下命令确保您的系统是最新的 apt 终端中的命令:
sudo apt update sudo apt upgrade
步骤 2. 安装 LAMP 堆栈。
需要 Debian 11 LAMP 服务器。 如果您没有安装 LAMP,您可以在此处按照我们的指南进行操作。
步骤 3. 在 Debian 11 上安装 Icinga 2。
默认情况下,Icinga2 软件包在 Debian 11 基础存储库中可用。 您可以使用以下命令安装它:
sudo apt install icinga2 monitoring-plugins
安装后,启用 Icinga 2 以在服务器启动时启动:
sudo systemctl start icinga2 sudo systemctl enable icinga2
步骤 4. 配置 MariaDB。
现在我们为 Icinga 创建一个数据库和用户:
mysql -u root -p
这将提示您输入密码,因此输入您的 MariaDB 根密码并点击 Enter. 登录到数据库服务器后,您需要为 Icinga 2 安装创建一个数据库:
MariaDB [(none)]> create database icingaweb2; MariaDB [(none)]> grant all privileges on icingaweb.* to icingawe[email protected] identified by 'strong-your-passwd'; MariaDB [(none)]> flush privileges; MariaDB [(none)]> exit;
完成后,现在我们使用以下命令为 Icinga 2 安装 MariaDB 插件:
sudo apt install icinga2-ido-mysql
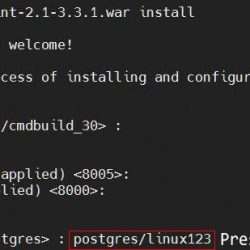
输出:
接下来,选择是并按回车键。 系统将提示您配置数据库 icinga2-ido-mysql with dbconfig-common 如以下屏幕所示:

接下来,启用 ido-mysql 使用以下命令的模块:
icinga2 feature enable ido-mysql
最后,重新启动 Icinga 2 服务以应用所有配置更改:
sudo systemctl restart icinga2
步骤 5. 配置 Icinga Web。
Icinga 提供了一个 Web 界面来监控 Icinga 2。您可以使用以下命令安装它:
sudo apt install icingaweb2 icingacli
然后,使用以下命令生成一个秘密令牌:
icingacli setup token create
步骤 6. 访问 Icinga 2 Web 界面。
成功安装后,打开您喜欢的浏览器并导航到 https://your-ip-address/icingaweb2/setup 并完成所需的步骤以完成安装。 如果您使用防火墙,请打开端口 80 以启用对控制面板的访问。

恭喜! 您已成功安装 Icinga。 感谢您使用本教程在 Debian 11 Bullseye 上安装最新版本的 Icinga 2 网络监控。 如需更多帮助或有用信息,我们建议您查看 Icinga 官方网站.